|
Confirmation of Privacy PolicyPlease note that some functions of this website require you to agree to the terms and conditions that are outlined in our privacy policy. Until then, this message will be displayed from time to time. With your consent, you also agree to the use of cookies. Additionally, by using this website, you accept that non-personalized log and tracking information from accessing our website can be saved and processed according to our privacy policy. |
|||
|
Knowledge Base / FAQ
ID: KB00306EN | short link:
Input selection switches U86 XT and U168 XT
Both U86 XT and U168 XT have an on-switch for input selection. Since the first two input channels (microphone + Hi-Z combo jack) on the U86 XT and the first four input channels (2 x microphone + Hi-Z combo jack / 2 x microphone) on the U168 XT are assigned twice, the rear line outputs become 1 and 2 or 1 to 4 deactivated as soon as the front input has been activated with the on switch.
Note: Only the first two input channels (microphone + Hi-Z combo jack) of the U86 XT and the first four input channels of the U168 XT have this double assignment.
Note: The double assignment is an advantage, since a line signal does not have to pass through the microphone preamplifier unit, which would result in a loss of sound, but can simply be connected on the back using the specially designed line inputs. In this case, the on-switch on the front would not be activated.
Note: It is also possible, of course, that an XLR (mic input) or instrument cable (Hi-Z input) remains connected at the front, while you have connected a line cable at the rear in the line input. You decide which signal is recorded by means of the on-switch, so there is no annoying plugging and unplugging of cables.
The picture of U86 XT below shows the front-side on-switch on channels 1 and 2 below the activation of the phantom power.

This picture shows one of the two combined inputs microphone and Hi-Z. At the bottom right next to the combo jack is the switch for activating the microphone input (while simultaneously deactivating the respective rear line input), next to it is the gain control for adjusting the input sensitivity.
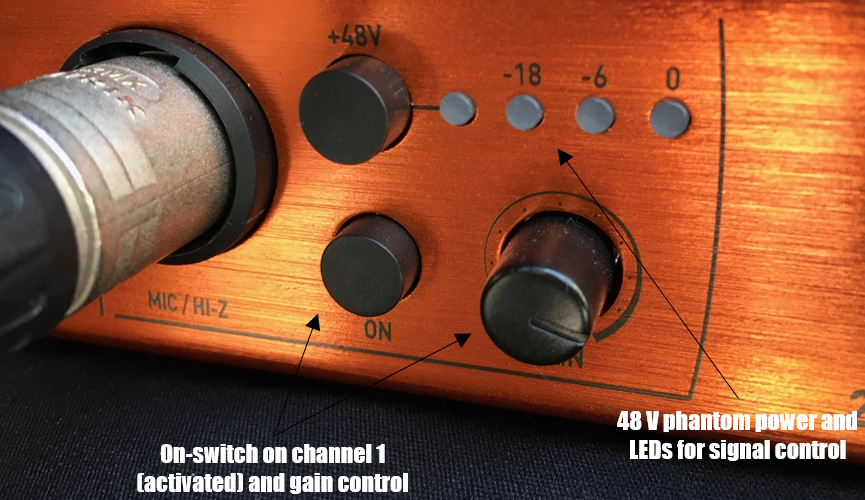
Above you can see the on-switch for phantom power and the LED chain for overload indication.
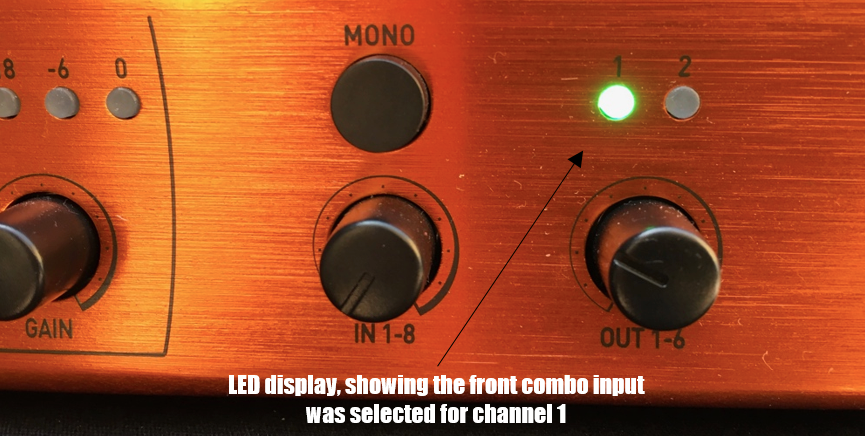
To the right of the mono switch for the monitor mix are two LED lights on the U86 XT and four on the U168 XT. These indicate whether the respective microphone or Hi-Z input was selected, which would deactivate the corresponding rear line input.
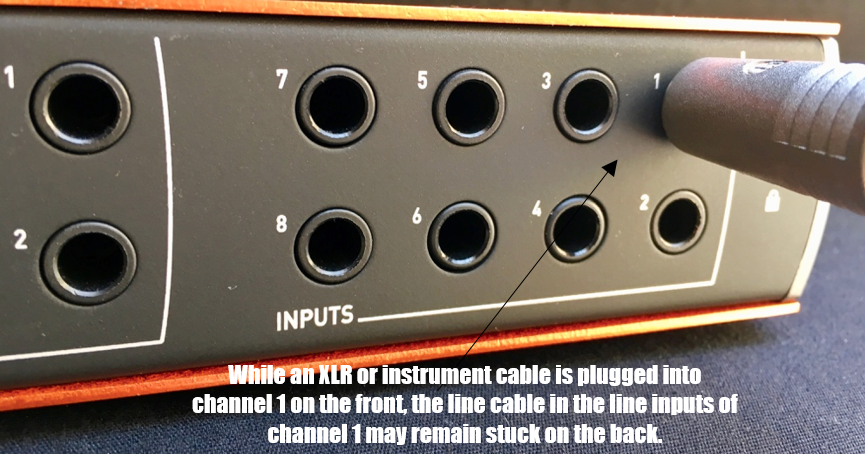
Above is the rear view of U86 XT with connected line cable, channel 1.
Note: If you are sure that the correct input is selected but recording does not work, it might be caused by a security setting blocking audio input. If you use macOS, check this article. If you use Windows, you can read about it here.
Related productsMore support pages |
Tags
Download
|