|
Confirmation of Privacy PolicyPlease note that some functions of this website require you to agree to the terms and conditions that are outlined in our privacy policy. Until then, this message will be displayed from time to time. With your consent, you also agree to the use of cookies. Additionally, by using this website, you accept that non-personalized log and tracking information from accessing our website can be saved and processed according to our privacy policy. |
|||
|
Knowledge Base / FAQ
ID: KB00202EN | short link:
Replacement of studio monitor protection fuse
Our active studio monitors are all protected by a fuse that is placed inside the 3-pin connector that connects to the mains / power outlet. When the speaker is not switching on and you are sure it has been connected properly, it might be that the fuse has been burned. The fuse is a replaceable part that can be purchased via most music or electronic retailers and many mail order companies or even local shops that supply electrical parts and it is very inexpensive. When replacing the fuse, you need to make sure it is the correct one for your speaker model. The table at the bottom of the article lists all our studio monitors and what fuse they are using.
Replacement procedure
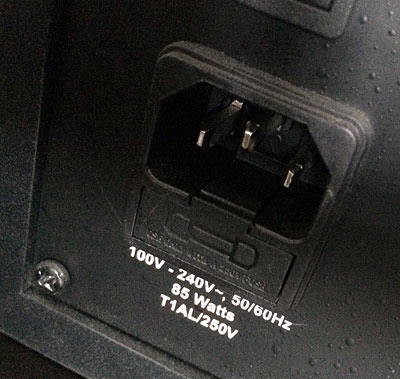
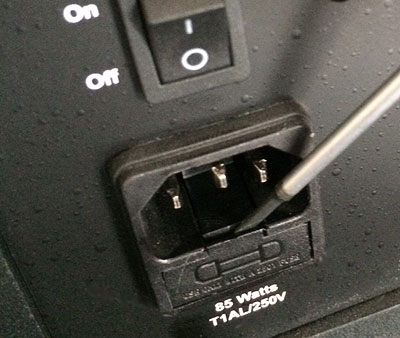
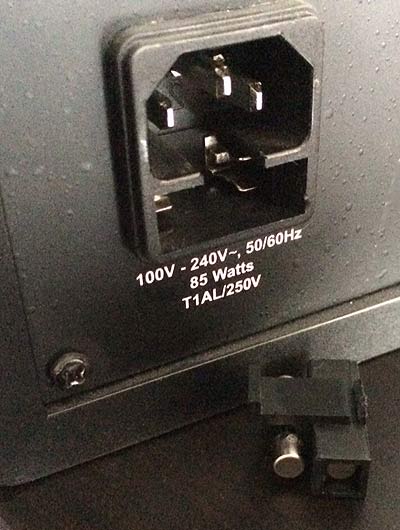
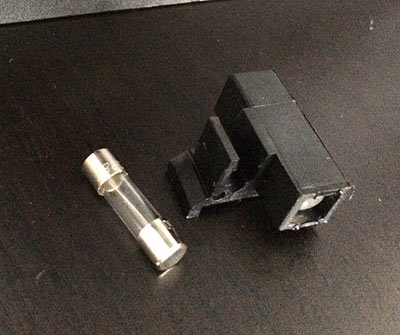
The fuse of our studio monitors is placed inside a small plastic drawer next to the power connector on the backside of the unit. The following pictures give you some details:

The location of the fuse next to the power connector.

Opening the fuse receptable plastic drawer with a screw driver.

The plastic part removed with the fuse mounted to it, next to the speaker.

The fuse removed from the plastic part, next to it.
In some cases there might be a spare fuse inside the square section of the plastic part (depends on the model and production date of the studio monitor). If it is there, you can use that and clip it into the front and use it instead, before you plug in the plastic part again to it's original position. If you need to get a new fuse (see below), install that one instead.
Table with fuse models
The following table lists all our studio monitors and describes the required fuse. If you need to buy a replacement, mention the model to your supplier.
| speaker model | fuse model |
| SW8000 | T2A L (at 250V) |
| nEar04 | T1A L (at 250V) |
| nEar05 classic | T1A L (at 250V) |
| nEar06 | T1A L (at 250V) |
| nEar08 classic | T2A L (at 250V) |
| nEar05 eXperience | T1A L (at 250V) |
| nEar08 eXperience | T2A L (at 250V) |
| SW10K | T1.6A L (at 230V) or T3A L (at 115V) |
| SW10K eXperience | T2A L (at 250V) |
| aktiv 05 | T1A L (at 250V) |
| aktiv 08 | T2A L (at 250V) |
| aktiv 10s | T2A L (at 250V) |
| uniK 04 | T1A L (at 250V) |
| uniK 05 | T1A L (at 250V) |
| uniK 08 | T2A L (at 250V) |
| uniK 05+ | T1A L (at 250V) |
| uniK 08+ | T2A L (at 250V) |
| nEar i5 | T2A L (at 250V) |
| nEar i7 | T2A L (at 250V) |
| nEar i8 | T2A L (at 250V) |
Related products
More support pages |
Tags
Download
|
